At this time, I had planned on a trip to Portland with the family so off we went. Upon our return...voila...a package in the mail with the requisite tools...mainly a crowning file and notched straightedge. So...here we go...time to dress the frets...
Time to break out the new crowning file. These things are not cheap. Best price I could find was $72 USD. I actually had bought one from another supplier to dress my own guitar but the diamond coating started to come off the file as soon as I started to use it. Fortunately, they were willing to take it back. I was hoping it wouldn't happen with this new file. Here is a picture of it...
Fortunately, his guitar had a removable hard-tail so I just loosened the strings and pulled the whole assembly off the bridge. I forgot to take a picture of the hard-tail but here is a photo of the frets showing the wear. The frets were also very uneven...especially where the neck meets the body. Major fret job required.
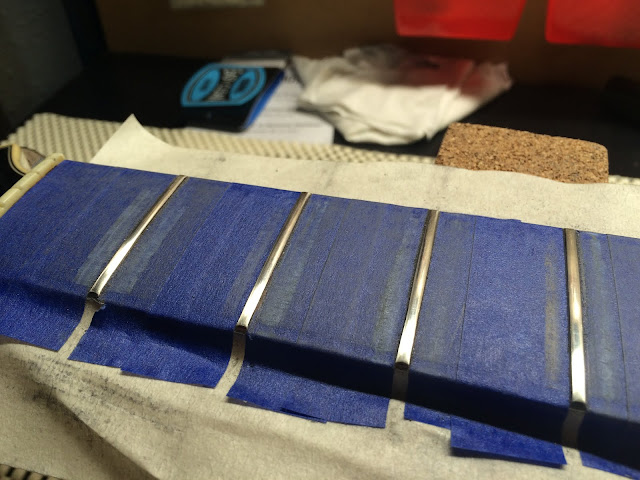
I masked off the fingerboard and put a cover over the pickups to prepare the guitar for the dressing.
Now the real work begins. I use a sharpie to "paint" the frets so I can see when the frets are level after sanding with the beam sander.
Here's the beam sander
A couple of shots of the frets still needing more sanding. You can still see a few divots on the left fret.
As you can see there is a large section of frets from about 9 to 14 that are lower than the others. I had the notched straightedge on the fingerboard before I started so I know the neck was straight before I started.
After beam sanding...time to crown...
Time to break out the new crowning file. These things are not cheap. Best price I could find was $72 USD. I actually had bought one from another supplier to dress my own guitar but the diamond coating started to come off the file as soon as I started to use it. Fortunately, they were willing to take it back. I was hoping it wouldn't happen with this new file. Here is a picture of it...
I painted the frets with the sharpie again so I could see the crown shape up as I was filing the fret. Luckily,..no problems with this new file. Here's a shot of the fret after crowning next to one that had not yet been done.
All frets crowned.
Next comes the laborious process of sanding the frets with progressively higher grit sandpaper. I started with 400 working across the frets to smooth out the crowns. I then used a sanding stick to remove the sanding marks going across the frets and finished them up with 600, 1000, and 1500 grit sandpaper going along the frets. Here is the shot somewhere in that process...
Next we go to the polishing compound. Using the buffing wheel attachment of my rotary tool, I started to polish the frets to a high mirror shine. You can see the difference in the frets. The ones with red compound on the blue tape has been polished.
Here is a shot further back showing the buffing wheel.
Fret Dress Complete. Divots have been removed and the frets are now also level.
Cleaned up the body and added a bit of lemon oil to the fingerboard. Almost ready to put the strings back on. Oh...and in this shot, you can see that I removed the hard-tail from the mounting posts. Look at that white strip between the 2 posts where the hard-tail cast its shadow. You can see the rest of the guitar's body has darkened over time.
Stings back on and you can see the hard-tail back on the posts. I had to redo the setup since I had adjusted the truss rod to dress the frets. String height and relief set as low as possible without buzzing. Since John doesn't do any bends when he's playing, I can get away with a slightly lower action on the guitar. I also adjusted the intonation so it plays in tune all the way up the neck.
Setup / Fret Dress complete.
Some "glam shots" ;-)


